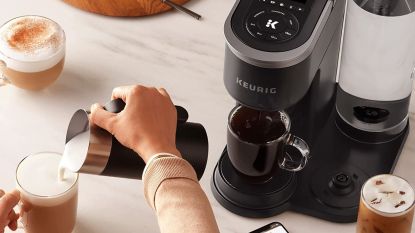

Modern technology at its finest is a Keurig coffeemaker. Your morning can go well or poorly depending on how your coffee is brewed. The Keurig coffee maker can be an excellent way to guarantee that you get your morning java quickly and easily! But only if your machine is operating correctly.
But if the machine isn’t working, that does you no good. Thus knowing Keurig coffee maker troubleshooting tips is very important. Although we at Roasty prefer more labor-intensive brewing techniques, like a french press or pour-over, this device can be useful and will ease your life a little.
Let’s explore some typical Keurig coffee maker issues and how to resolve them.
How Does A Keurig Coffee Maker Work?
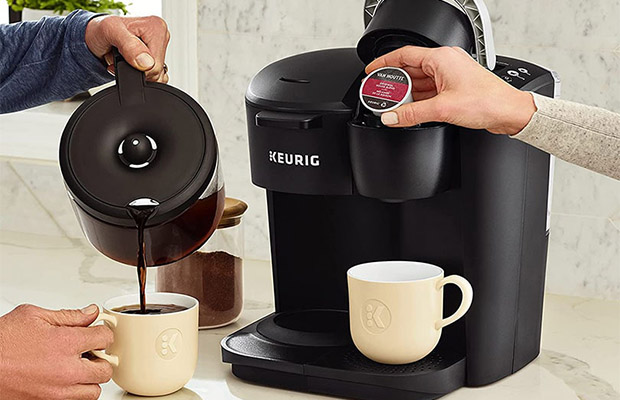
K-Cups are the single-serve coffee pods used by every Keurig coffee maker. You insert your K-Cup into the pod holder of the device and then secure the lid.
The lid of older models has a single needle that pierces the k-cup pod. However, the multistream technology in more recent Keurig coffee makers has five needles to offer a more even extraction.
The water circulates through the heating elements as it pumps from the water reservoir to the K-Cup’s coffee grounds. Coffee is extracted by water, which drips into your cup through the exit needle underneath the cup holder.
To make it easier for you to spot issues and find solutions, it’s critical to comprehend how Keurig machines operate. After all, only a few parts—the water reservoir, needles, cup holder, and internal parts—are utilized by Keurigs during the brewing process.
Therefore, it is likely that any problem you experience has a connection to at least one of those four factors. To get them fixed, you might need to get in touch with Keurig customer service if the internal electronic components are broken.
Related Reading: How To Use Keurig Coffee Maker?
10 Keurig Coffee Maker Troubleshooting Tips
1. Change The Water
The buildup of hard water is one cause of Keurig coffeemaker problems. It’s possible that the hard minerals in your tap water will build up inside the machine and cause it to malfunction. To remove hard mineral deposits from water, use a water softener or water that has been filtered.
2. Let It Warm Up
Your Keurig coffee maker might occasionally require a few minutes to warm up. Give it some time to warm up if you’ve just turned it on for the day. Otherwise, you might have trouble making your first cup.
3. Make Sure Your Keurig Coffee Maker Is Plugged In
Yes, it may seem obvious, but if you haven’t had any coffee that day, it’s simple to forget.
4. Run It Clean
If this doesn’t work or you can’t get access to softer water, try running the machine a few times with just water and no K-cups. This might help your machine start up again by washing out some of the deposits.
5. Make Sure The Reservoir Is Sealed
The machine will not operate if the magnetic reservoir is improperly sealed as a safety measure. Check to make sure the reservoir is properly positioned if your machine won’t turn on or brew.
6. Make Sure The Power Is On
Sometimes you’ll remember to plug it in, but then you’ll forget that you need to press the little power switch to make it work. Keep in mind that when you have Keurig issues, you frequently have no coffee.
7. Descale
To keep your Keurig coffee maker operating properly, you should regularly descale it. Vinegar and water mixed together and left to soak in the machine for 30 minutes before being flushed several times with fresh water is one method of descaling that is frequently successful. (Note that using this cleaning method could void your warranty and is not recommended by Keurig. Purchasing a descaling solution is an alternative.
8. Shake Out Air Bubbles
Your machine could occasionally develop air bubbles that would obstruct the brewing procedure. Fill the reservoir and gently shake the (unplugged) machine to address this. Any air bubbles should be eliminated as a result.
9. Make Sure There Is A Pod In The Chamber
Again, this may seem obvious, but you’d be surprised at how many people think they’re putting in a pod and are shocked when only plain water is coming out. Make sure to double-check that there is a pod present if you aren’t getting any coffee.
10. Deep Clean Your Keurig
You may need to perform a deeper cleaning on your machine after using it regularly for a few months. See how to fix your Keurig if it isn’t brewing a full cup of coffee or what to do if the water pump on your Keurig isn’t working. There are many videos and tips in these posts.
Common Keurig Problems And How To Solve It?
1. Keurig Is Not Turning On/won’t Turn On
Think about pressing the power button to start your dependable Keurig, but nothing happens! However, when your morning coffee is on the line, it’s a problem worth fixing sooner rather than later. Of course, you can experience this with many electrical appliances at some point.
Three possible causes—not all of which have to do with the coffee maker—are most likely to be to blame. First, it’s possible that the device’s plug is not in properly. Second, there’s a chance that the power outlet is broken. Finally, you might not have properly pressed the power button.
Verify that the machine is properly plugged into the power outlet. If you did and it still won’t turn on, check other appliances in the same power outlet. If they don’t, the problem is with the power outlet, not your Keurig. The problem ought to be resolved if you plug the Keurig into a different electrical outlet.
The power button not being depressed is yet another potential cause of your Keurig’s inability to turn on. Remember that you must tap the power icon on the LCD’s lower right side if you have a Keurig Plus or Keurig 2.0 Series machine.
2. Keurig Dispenses Too Much Coffee
What creates more mess than a leaky Keurig? Too much coffee being brewed by a Keurig! There are ways to fix the problem if this occurs.
Leaning the puncture needle with a paperclip first may help to resolve the problem.
Try the Keurig burp if that doesn’t work! Here’s what to do:
- Take the water tank out of the machine and unplug it.
- Bring the machine to the sink and flip it over.
- Slap the machine’s base several times with an open palm to loosen and clear away any debris.
- Run a water-only cycle after reassembling the appliance.
It’s hoped that your Keurig will brew the appropriate quantity of coffee. If you’re still having problems, some Keurig users shared the following fix: After thoroughly cleaning every component, you should run a descaling cycle and then several water-only brew cycles.
3. Keurig Won’t Brew
After pressing the brew button, you might occasionally discover that your Keurig is not brewing. Numerous factors could be at play, such as:
- parts of your Keurig that are attached and positioned correctly.
- A clogged needle.
- A clogged filter.
- in the water lines, trapped air bubbles.
- Descaling is necessary for the coffee maker.
Again, there are some straightforward fixes if the brew head isn’t producing any coffee:
Your Keurig coffee maker may have one or more parts that are not properly aligned or placed. Verify that the cup holder, water tank, K-Cup, lid, and handle are all securely fastened. Make sure the water tank is full as well.
Verify that the needle is not jammed. If it is, cleans it with a paper clip.
A filter is located at the bottom of the Keurig water reservoir. Water cannot be pumped out of the tank if it is clogged. Clean it, then use fresh water to run a brewing cycle. The pump should work if your Keurig can smoothly dispense water. Don’t use tap water; instead, use filtered water.
Air bubbles in the water lines could be a problem, preventing the machine from successfully pumping water out of the tank. Tap the machine gently to release them after unplugging it.
Finally, descale your Keurig to get the scale buildup out using a descaling solution.
4. Keurig Shows “Add Water,” But The Tank Is Full
On occasion, even though you have everything ready to go, including a freshwater tank that is full, the display will display the following error message: Add More Water. There are a number of potential causes for this, including a clogged filter, the reservoir’s placement, and the need for cleaning.
Refilling the water reservoir and making sure it’s properly repositioned should be your first line of defense. The magnetic contacts on the machine must make contact with those on the reservoir, remember.
Consider cleaning the reservoir and filter if this doesn’t work. Wipe down the reservoir gently with a damp cloth dipped in warm water and some washing-up liquid. Make sure the filter isn’t clogged as well by checking it.
Try resetting the device if none of the above works.
5. Coffee Grounds In The Cup
If your Keurig drips coffee grounds into the cup, it’s simple to fix. This (unwanted) extra may occasionally be used when brewing coffee in your Keurig.
A clogged exit needle and a descaling issue with your Keurig are two potential causes of this problem. Additionally, you must make sure you’re using the proper grind size if you’re using a reusable filter. Examining each fix now.
A lot of the time, it’s just a matter of too much coffee ground accumulation in the exit needle. Therefore, take the exit needle out and clean it gently first. Next, run a small-cup water-only brew and keep an eye out for any grounds that emerge. Continue until all grounds have been removed from the cycles. The machine might need descaling if this isn’t the problem.
In addition, use a coarse drip if you’re using a reusable filter. Only fill the basket up to the bottom of the brown band in the interim.
6. Keurig Leaks From The Bottom
Water leaking from the bottom of the Keurig, even when it’s not in use, is one of the most annoying (and messy) problems you might experience. But what causes it?
Usually, it’s a leaking water reservoir or a damaged o-ring. Overfilling the water reservoir is an additional factor, though. The internal hot water tank may also be the root of the problem. Let’s go over the answers.
- At the bottom of the water, the reservoir is the o-ring. Replace it if it is broken.
- Never fill the water reservoir to the top. If you overflow the maximum water line, the extra water will drip into the drip tray.
- Verify that the reservoir of cold water is producing water. Look under the water reservoir after removing it to see if there is any water. To check for leaks, hold the reservoir over the sink.
Try emptying the internal hot water tank if you haven’t overfilled the tank, the o-ring isn’t broken, and the cold water reservoir isn’t leaking. Here’s how:
Step one: A mug ought to be put on the drip pan.
Step two: Empty the internal hot water tank
- The machine should be turned off, but left plugged in.
- Lower the cover of the cold water reservoir.
- When the mug is completely filled with water, press the “brew button.” The water won’t start dispensing until after three to five seconds.
Step three: Wipe the water from beneath the machine and empty the drip tray
Step four: Fill the cold water reservoir with 6 to 8 ounces of water. Brew some water only (without a pod).
7. Keurig Leaks Water While Heating
There could be a number of causes for water leaking from your Keurig while it’s brewing. For instance, the coffee maker might be clogged, or you might have overfilled the water reservoir. The upper gasket might also be broken, or the puncture needle may have built up debris.
Don’t fill the reservoir past the maximum line if it’s already too full. In the interim, make sure you clean the coffee maker properly by following the instructions. It will be necessary to tighten the gasket if it is loose. You’ll need to order a replacement, though, if it breaks.
Lastly, inspect the puncture needle and clean it of any dirt or debris.
8. All The Keurig’s Lights Are On
If you have an older Keurig, you might discover that all the lights suddenly come on. When that occurs, try the following:
- Plug your device back in after unplugging it and waiting a short while.
- With the lid open, press and hold the power button.
- Press the cup size buttons repeatedly, going from small to medium, to large.
- Repeat pressing the buttons in the order described above while closing the lid.
Hopefully, this will reset the device, turning on only the power button light.
9. Add Water Indicator Not Flashing
If you own a K-Mini, K-Mini Plus, or K-15 and have descaled the device, it’s possible that the “add water” light won’t flash occasionally even though the reservoir is empty. The good news is that there may be an easy solution.
- Make sure the device is powered.
- To pour any remaining water from the reservoir into the brewer, raise the handle.
- Place a mug on the drip tray and turn the machine off if the light still doesn’t flash.
- Once the entire amount of water has been poured into the mug, press and hold the “Brew” button.
10. Keurig Only Brews Half A Cup
What if Keurig doesn’t produce a full cup of coffee? A Keurig machine that produces too much coffee can be messy. Although this issue won’t ruin your countertop, having only a portion of the coffee you wanted is hardly ideal.
The Keurig is most likely the source of the issue. Run several water-only brew cycles after first cleaning the entrance and exit needles.
Descale your Keurig to remove any buildup in the water line if the device is still not properly dispensing water.
Hopefully, these quick fixes will make the issue go away. If they don’t, though, a thorough cleaning might be required.
Tip: Run a water-only brew cycle after each use, especially after using a hot chocolate or cocoa pod, to prevent build-up.
11. Keurig Turns On/off On Its Own
Your Keurig’s ability to randomly turn on or off is perhaps the most unsettling issue you could experience with it. There are a few explanations for this, most frequently involving the “Energy Saver” or “Auto On/Off” feature or the placement of the magnet on the water reservoir
A Keurig’s “Energy Saver” feature, which causes the device to shut off after a predetermined period of time, is available on some models. Similar to this, if your machine has an Auto On/Off feature for automated brewing and it is enabled, it could suddenly turn on or off. Again, making sure the feature is turned off will fix the problem.
Each device is unique. For instance, the K-Class and K-Cafe automatically shut off after two hours. To turn off the feature, hold down the “Strong” and “8 oz” buttons for three seconds. However, the Keurig Mini automatically turns off after 90 seconds, and the auto-off feature cannot be disabled. You must restart the computer instead.
The magnetic contacts in the water reservoir must also be in contact with those on the machine, which is another crucial step. The device will shut off if they are not.
12. Keurig Is Not Heating
Being a home brewer, it’s one thing to plan to make cold coffee, but it’s quite another to receive a cold cup of coffee when you were expecting a steaming hot one.
There are several reasons why your Keurig might not be heating up:
- It might not be able to pump water out of the water tank.
- The water pump isn’t working properly, which affects the heating system.
- Your Keurig may be clogged by calcium or coffee grounds.
In the first two scenarios, you might need to order a replacement part. To ensure that you get rid of any extra grounds or calcium buildups, clean and descale your Keurig first. To see if Keurig’s heating system is operational, run a water-only cycle.
13. Keurig Is Stuck In Preheating Mode
Your Keurig coffee maker might get stuck in preheating mode if it’s an older model, like the Keurig 2.0 K400.
If this occurs, turn off the Keurig and unplug the coffee maker. Reconnecting the Keurig’s power cord and turning it back on may fix the problem.
If the issue persists, there might be a loose wire close to the machine’s lid. The wire may become separated from the microswitch as a result of repeated lid opening and closing over time.
If your Keurig is out of warranty, you might try taking off the top plastic cover to access the wires, then reinserting the loose white wire into the micro switch.
14. Keurig Coffee Tastes Bad Or Burnt
In addition to any technical issues, you occasionally might discover that the coffee a Keurig brews doesn’t taste good. There are many causes for this, and most of the time the issue is straightforward to solve:
- Make sure to routinely clean and descale your Keurig because, over time, coffee and scale can accumulate inside of it. If you use vinegar to descale the machine, make sure to rinse it out completely to get rid of the vinegar’s taste. Use the authorized descaling method instead.
- Make sure to substitute filtered water for tap water.
- Freshly brewed coffee from Keurig coffee makers frequently tastes plasticky. To get rid of the plastic taste from a Keurig, take the necessary actions.
- A high-quality K-Cup brand or reusable K-Cups with freshly ground coffee are both recommended.
15. Keurig Lights Blinking (Flashing)
It’s been demonstrated in this article that your Keurig occasionally might behave in an unpredictable manner. The most ominous sight, though, is when every light starts to blink at once.
You have a few options for resolving the problem, depending on the model. Try pressing the “auto-off,” “small cup,” and “large cup” buttons at the same time if you have a Keurig Classic.
You can try the following steps if only the “Add Water,” “Heat,” and “Medium Cup” lights are flashing:
- Make sure the cold water reservoir is placed correctly.
- Fill a measuring cup with a 6 or 8-ounce water-only brew. The problem should be resolved if the anticipated amount of water dispenses. If not…
- Run a successful water-only brew if you’re using a water filter, then replace the charcoal filter and put the water filter back in the brewer. If that doesn’t work.
- Brew three additional 8- or 6-ounce glasses of water-only. The issue ought to be resolved if the final brew pours the right amount of water.
It’s possible for your Keurig Elite or Classic to need to “prime” if the lights flash, which is one reason they might do so. Similar to this, some special edition and platinum brewers have a Prime indicator on the screen. In this case, adhere to the instructions in the video.
As you can see, most issues with your Keurig can be fixed by descaling, cleaning, or resetting the device. Let’s look at the most common issues and how to solve them.
How To Reset Keurig Coffee Maker?
The likelihood that a factory reset option will be present in the display menu of your high-end Keurig coffee maker makes it simple to reset the device. However, many less expensive models lack that feature, including the K-Mini and K-Slim.
However, you can reset less expensive machines by doing the following:
- After removing the water tank, unplug your Keurig and turn it off.
- For a few minutes to a few hours, unplug the Keurig coffee maker and detach the reservoir.
- Reconnect the Keurig plug.
- Reattach the water reservoir and turn the machine on, making sure it is placed properly.
Your Keurig should be correctly reset now if you follow the instructions given above.
How To Descale Keurig Coffee Maker?
Specific instructions for descaling your machine may differ depending on the Keurig model you have. As a result, we advise looking up step-by-step instructions in the user manual of your machine.
However, descaling the majority of coffee makers involves a few standard steps.
- Remove the pods and filter after emptying your water reservoir and drip tray.
- A coffee cup ought to be put on the drip pan under the brewer.
- Water should be poured into the water tank in a 1:1 ratio with a descaling solution.
- Follow the directions specific to your model when running the descaling cycle.
- Run a few rinse cycles using only water.
Step-by-step instructions for descaling the K-Supreme Plus, one of Keurig’s machines, are provided in the video tutorial that follows. Even if you lost your manual, step-by-step descaling tutorials are simple to find because Keurig makes some of the most well-known coffee makers.
Final Thoughts
Coffee makers like the Keurig are some of the most practical and simple to use available. Additionally, a wide variety of K-Cups are available, allowing you to easily enjoy almost any type of coffee.
However, Keurigs can occasionally experience problems that aggravate home brewers. Nevertheless, as this article has demonstrated, even the most complex issues can frequently be resolved in a straightforward manner.
This detailed maintenance manual for your Keurig has a long list of troubleshooting steps. Remember to get in touch with Keurig customer service if you can’t solve your issue after diagnosing it and trying one of our solutions.
You May Also Like: How To Clean Ninja Coffee Maker?